Kerryann's Sticky Toffee PuddingMoney Saving Meals

0 komentar

Kerryann's Sticky Toffee PuddingMoney Saving Meals

Hi Food Tube! Kerryanne here. I'm going to show you how to make classic sticky toffee pudding. It's warm, rich and gorgeous. It serves eight people and comes in at around about 65 pence.

That's around 1 US Dollar, per person. Who's going to argue with that. Don't worry if you've never made it before. Don't worry if you've never tried it before.

I'm here with you every single step of the way. Lets get started. I've got 225 grams of fresh dates, with the stones removed. Gorgeous.

I need one teaspoon of bicarbonate of soda. It's going to act as a raising agent. 200Mls of boiling hot water. It's gonna soften them up a right treat.

We're gonna leave them to one side, and we're gonna get started on the cake. In this bowl I need 85 grams of softened unsalted butter. A 170 grams of caster sugar. Cream it together until it's all pale and lovely.

As a kid growing up, this was one of my favourite, favourite desserts. It is a little bit naughty so it's not something you'd have every weekend, but it's so good. You can see it's gone really pale and fluffy. I've got two large free-range eggs.

We're going to do those one at a time. Just because it's easier to mix it in. Now guys, you can use an electric whisk if you have one. I thought I'd do it like this today to show you the original way I was taught to make cakes.

You learn the proper way and then you adapt as you get a little bit more confident. And with confidence comes laziness. Shh! I've got a quarter of a teaspoon of ground mixed spice and then a quarter of a teaspoon of cinnamon.Give that a little mixy, mixy, mixy. Next, I'm going to add to add two tablespoons of erm, a malt drink.

I'm using Ovaltine, but if you can't get that any other kind of malt drink will do. Horlicks. Even the supermarket own brand malt drinks will be fine. And two tablespoons of natural yoghurt.

All mixed together nice and lovely. And now we're going to add the flour. About 5 heaped tablespoons of self raising flour. In we go with that.

Okay. So that's all nice and combined. Look at that. Lovely.

Now, we're going to go back to our dates. That hot water has now made those dates even more stickier and even softer. So what we gonna do is whack them in this processor with the water as well. This is what we're looking for.

Almost smooth, but not quite. So I'm gonna put this into the cake mixture as well. Try not to leave any in the blender. Because it's all good.

We don't want to waste it. We measure things for a reason, and this puree now not only will it act as a raising agent, and help the cake grow in the oven, but the dates will also keep it really moist and gorgeous. So lets mix that in lovely. I've just got a little blob of butter, and some greaseproof, just to grease the over-proof dish.

So that when the pudding comes out of the oven it won't be stuck to the dish. They you have it guys. My sticky toffee pudding is ready to go in the pre-heated oven 180, gas mark 4. About 35 minutes.

See you when we're finished. Now I'm going to get on with the toffee sauce. I've got 115 grams of unsalted butter. A 115 grams of light muscovado sugar.

Straight in. 140Mls of double cream. Stir this over the heat until the butter's melted the sugar's dissolved, and it's darkened just a little bit. Okay so guys come and have a look at this.

Two minutes later and look what we've got. The most gorgeous, silky, sticky, caramelly toffee sauce that you're ever probably going to taste in your life. Right, so the sponge is in the oven. The sauce is ready.

I'm going to sit down for five minutes. See you soon. Look at that guys. Doesn't that just look amazing? Now I've taken that out a few minutes ago to check if it was ready, by doing this cool little tip.

You get a skewer stick it in, and if it comes out clean, there's no mixture of any kind, whatsoever on there,  you know it's ready. I've got my toffee sauce here. And I'm going to pour half over, so it soaks in lovely. And then the rest I'm going to pour into a jug, so we can serve on the side for the greedy ones like me who love a bit of toffee sauce.

You've got a little bit more on the side there. This is so good looking. Look at that guys. Oozy, gooey, sticky, delicious.

My mouth's watering. Here we go. Sticky toffee pudding. Now in my house they love it.

With a bit of vanilla ice cream. So there you have it guys. My classic sticky toffee pudding. Have a go.

Let me know how you get on. It's a brilliant, brilliant family favourite, It's delicious. It's affordable. The best part, affordable.

65 Pence per person,  or one dollar for you guys over there in the States. So for more money saving meals have a
look at jamieoliver.Com/savewithjamie And if you like what I'm doing here, have a little look at my new channel. Woop woop. If you want to see some more stuff from me don't forget to subscribe.

Let me know what you wanna see. But most importantly enjoy yourselves. Happy cooking. For loads more great recipes and money saving tips go to jamieoliver.Com/savewithjamie And for more simple, affordable and tasty family recipes check out my other videos on Food Tube.

Please have a look around and subscribe to get the latest videos when they're uploaded. See you later!.

Indian Mango Pudding Recipe

0 komentar

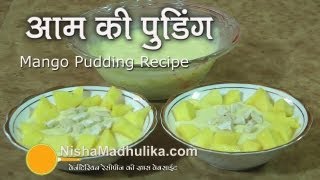
Indian Mango Pudding Recipe

Namaskar, Welcome to nishamadhulika.Com Ripe, yellow mangoes are available in market easily these days. Today we will prepare mango pudding. It is a dessert and you can eat it after dinner or at anytime. Let us see what all do we require to prepare mango pudding.

Finely chopped mango - 1/2 cup. Pulp of mango - 1/2 cup. Fresh cream (low fat) - 1/2 cup. Sugar - 4 tbsp.

Cashew nuts - 7 to 8. Custard powder - 1 tbsp. Cardamom - 4. Milk - 300 grams or 1 and half cup.

We will boil milk first to prepare mango pudding. Take a small amount of milk to dissolve custard powder in it. Mix custard in it. Dissolve it in such a way that no lumps are left in it.

Cut the cashew nuts till the time milk boils. Milk has started boiling and we will add custard in it now. Also, add sugar in it. We have cooked custard in milk for 6 minutes.

Turn off the gas. Put the Kadhai down to cool the milk. Add mango pulp and cream in it now. Also add powdered cardamom in it.

You can beat it with your hands or whip it by using an electric hand mixer. The mango pudding is now ready. Refrigerate it for 2 hours before serving it. Garnish it with pieces of mango.

Also, garnish it with pieces of cashew nut. It appears very mouth watering. Prepare and enjoy mango pudding and share your experiences with us. Let us meet again at nishamadhulika.Com.

HULK PUDDING CUPS - NERDY NUMMIES

0 komentar

HULK PUDDING CUPS - NERDY NUMMIES

Hey guys, its Ro! Welcome to another Nerdy

Nummies! I realized that we have made so many different
super hero themed treats, weve made Superman, Batman, Captain America,
Wonder Woman, but we have never made anything Hulk themed before. I love that little green guy! So, today we are gonna make some Hulk Themed
Pudding Cups, lets get started! The things you will need, will be: 2 cups
of whole milk, 3 eggs, but we are just gonna be using the egg yolks. 1/3 Cup
sugar, 3 Tablespoons of butter, 2 tablespoons of cornstarch, 2 teaspoons of
vanilla extract, and a pinch of salt. Were also gonna need some Oreo
cookies, a large saucepan, some small, clear cups, you can use glass
or plastic, Im using little glass ones.

I got these like in a little fancy dessert
set or something. Then to decorate you will need a black paint
pen, mines by Sharpie, I think I found this one at Michaels and a little
bit of green food coloring dye. This ones color is called mint green. Should be called Angry Green because were
making the Hulk, but They didnt know that Now lets put it all together! The first step is super easy, what were
gonna do is youre gonna put your butter and your vanilla extract into a medium
sized bowl, you dont need to mix them together or anything and
then youre just going to place your strainer on top, and were gonna set
this off to the side.

The next thing that were gonna do in our
saucepan, we are gonna pour in our sugar, cornstarch and a pinch of salt.
Then were gonna whisk it up. Now were gonna add our eggs, remember you
just want the yolk, so youre gonna take an egg, come on! Im doing the jiggle method, just jiggle
back and forth, boop! One yolk. And youre gonna do that to all of your
eggs. Lastly were gonna add our milk, oooooh!
Just pour it all in there, and were gonna whisk together one last
time until everythings smooth and combined! And once thats all mixed together were
gonna take our saucepan over to the stove! Turn your stove to medium-low heat and whisk
together constantly until the pudding begins to thicken.

This usually
takes about six minutes, just make sure to constantly stir so that
the bottom doesnt burn. After 6 minutes of mixing, reduce your heat
to low and using a heat-safe rubber spatula, stir for an additional 5 minutes. This will cause your pudding to become nice
and thick. Then, remove from heat and head back to your baking
station! Our saucepan is fresh off the stove, so be careful,
its hot! And now were gonna pour our pudding mixture
through the strainer, just be really careful.

Now Im just gonna use my
spatula, move the pudding mixture through. Now that our puddings all mixed
up, Im gonna color it green, using it a little bit of food coloring. You
can make it whatever shade of green you want, you can put just a couple drops
in. Im gonna be making it a deep green, and Im gonna use 8 drops.

And now
were gonna mix it up one more time! Our homemade vanilla pudding is now colored
green to look like The Hulk, I love it! Now we are gonna cover it with
a little bit of plastic wrap, so youre gonna take a little piece, that
will cover the whole bowl. And now youre gonna press it down into
the bowl, to touch the top of the pudding, you do this so while the pudding
is setting it wont form that top layer of skin. Once your pudding is covered were gonna
pop this in the fridge for about 2 hours to set. While the pudding is setting
in the fridge, we are gonna make some decorative toppings using the Oreos
to look like his hair, and do a little arts and crafts.

So, the first
thing that Im gonna do is crush up my Oreos, but before I do that, what you
gotta do is take your Oreo, give it a twist, boop! Separate it, and then,
youre just gonna want the side without the filling I know! Without the
good stuff! And then youre gonna scrape off the
good stuff, the filling. We dont want the white filling, even though
I want the white filling! Because the Hulk is not a silver fox yet,
OK, hes not there yet! Now weve got all of our Oreo Cookies without
the filling and were gonna put them in a little plastic baggie. Zip it up tight, and then theyre ready
to smash! Ready to Hulk Smash! Da-neee! Oh Geez! This isnt as easy as I thought
it would be! Punch. Now were gonna pour our crushed Oreos back
into our little bowl.

And OK, its really hard to be The Hulk! No
wonder hes so angry, he cant do anything when hes The Hulk! He cant
even open a bag! Yes! Oh no! Ow! Pfft! Pfft! Just. YES! WE DID IT! Alright, these are done, and now were gonna
do some arts and crafts! Now were gonna decorate our glasses with
a little DIY. All youre gonna do is take your black pen,
ooop! Ive gotta shake mine. And now, Im just gonna draw an angry face
on the lower part of the cup.

Heres an angry face, hrmmmmm! Weve got all of our little cups decorated
and now, time to assemble! Ha! Did you get it!?!? Time OK! So, what youre gonna do, is I scooped some
of our pudding into a plastic baggie, for a little bit more control, this
part is totally optional. Were gonna fill up our pudding cups to
the top of the eyebrow. Then youre gonna do this to the rest of
your pudding cups, you can make as many as youd like! Hes like, You wouldnt like me when
Im angry! And Im like, Mmmm, if you were vanilla
pudding I would! Our cups are all filled and now were gonna
add our topping, our cookie crumbles, yum-yum-yum-yum-yum! Were just gonna spoon on, some cookie crumbs,
right on top. Fill the rest of the cups with cookie crumbs,
and then theyre ready to serve! Ta-da! Here are our Hulk Theme Pudding Cups
that we made today! They are super cute and if you like cookies and cream, homemade vanilla pudding, with a little cookie crumble on top is perfect! Theyre
so good, and these little treats are so easy to make! I love it! Ill be posting lots of pictures of these
little guys on Facebook, Tumblr, Instagram and Twitter, and if you guys make
these, please take a pictures and send it to me! Because I love seeing your
baking creations, it just makes my day! And, if you have any other ideas for
any other Nerdy Nummies, please let me know, leave me a comment down below
and I will do my best to make it happen! Alright, thanks again you guys, bye-bye! Mmmmm, and now one for me! Mmm-mmm-mmm-mmm.

Mmmmmm! Mmmm-mmmmm-mmmmm-mmmm-mmmm! Look-it, hes so mad, but Im so happy!.

How To Make Yorkshire PuddingsJamie Oliver

0 komentar

How To Make Yorkshire PuddingsJamie Oliver

Hi guys. Me and the Food Tube family
together with our friends at LV. Here to help you guys out. You told us
what your biggest cooking headaches are, so together we will show you our secret
tips and tricks which will change the way you
cook forever.

Okay lovely people. How to make the perfect Yorkshire puddings. Lets just, lets just talk about the perfect Yorkshire pudding. That beautiful little thing that you can put
gravy in.

It's great with roast dinners. You know crispy on the outside, bit chewy down here. Let's do it. First up, big bowl.

Whisk And I need four eggs. I'm using beautiful fresh free range eggs, and we're gonna whisk
those up. #I'm using a big bowl so we can get some nice air in there. Then I'm gonna go in with 200 millilitres of whole milk.

200 Grams of plain flour. Now you can
sift it. You know when you sift it just makes it
nice and light and no lumps we don't want lumps in there. So just whisk up your batter.

As you can
see now it's nicely whipped up I'm just gonna add a little pinch of salt and nothing else. That's basically it. Now we want it to
just coat the back of a spoon. Should just stick nice to it.

That's the batter made. What I do want to do is get it from a bowl which is perfect for making it, into a
jug because that's perfect for pouring it quickly. Because that is another important part
I'll talk about in a minute. We are using a sunflower oil.

You can use the ground
oil or a Sunseed oil. Absolutely these are oils that can handle high heat. We want one centimeter in each mould. So I'm going to fill out these three and what I like to do is then just gently, but  evenly pour the oil all the way along and by the time you hit the bottom you
have absolutely perfect exact measurement across every single one.

And I know what you're thinking, I invented it, or at least I think I did. Now we are gonna pre-heat our oven to
190 degrees Celsius I've got one in there already, okay. It's been there for about 15 minutes. So my pre-heated oil comes out, this is very hot I'm gonna go in with my batter here I'm gonna use a spoon.

What you don't
want is loads of batter touching the side. If you have batter in between, what's
gonna happen is that will drag your Yorkshire
pudding down, and it will stop it rising as efficiently. And what's happening now
you can see the hot oil is starting to cook the batter on the outside, and as we put this in the oven the heat of the oil is gonna push the batter up the side to create that
lift. Okay.

We're gonna go straight back into the oven. I'm gonna close the door and we're gonna leave it. You want to dedicate the whole oven just to Yorkshire puddings. They're gonna cook for about 20-25 minutes until golden and crispy, and gorgeous.

You're gonna love it! Come on baby! So for me guys this really is the perfect Yorkshire pudding. You can go bigger, you can put more batter in. Then I think it goes too crispy, too dry. I
like this kinda size I like the kind of
balance crispiness around here, and the chewiness from inside.

They're absolutely gorgeous. I wanna show you guys something even more incredible to go with
Yorkshire puddings that's not the usual thing. So I've got some nice smoked salmon. I'm gonna put it down onto a beautiful border platter.

To compliment that I want a nice simple sauce. Now you could use sour cream yogurt, or creme fresh. Just beat it up and I'm gonna add just the juice of one lemon. Here's a fresh horseradish.

So we're gonna peel the horseradish. A little grating over the salmon, just like snow. What I like about this is it's contrast. Fire and lightness.

It's beautiful. Mix it up. Just gonna take some of this dill, and from a height just pick it and then freshly cooked hot Yorkshire puddings, loading it with
that hot sour cream and horseradish sauce. A nice bit of smoked salmon.

And then just find a nice little quiet moment, for you and that beautiful combination, and just tuck in. If you haven't subscribed to Food tube or Drinks Tube subscribe! Its free and we love you and we love it, so keep coming guys. If you like this video please like it,
share it on your social media. Take care.

Bye-bye!.

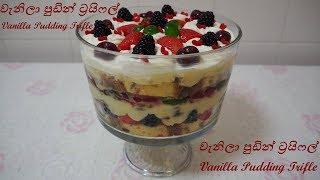
How to make Vanilla Pudding Trifle - Episode 48

0 komentar

How to make Vanilla Pudding Trifle - Episode 48

Hi There, Today I'm showing you how to make a Vanilla Pudding Trifle. The written recipe of this Trifle is available on my website. You can find the link for it in the description below. Trifle is a very rich and beautiful dessert.

It's filled with Cake, Fruits, Pudding and Cream. And it has several layers of them. When you have a gathering of relatives and friends, instead of making several desserts you can make this Trifle only. Your party will have a difference with this.

There are several types of Trifles. Today I'm showing you, How to make a Vanilla Pudding Trifle. If you like my videos, please share them with your friends. Add comments with your ideas and suggestions.

And subscribe to my Youtube channel. If you haven't already subscribed to my channel, click on the subscribe button below the video. Then, click on the bell icon comes near that. Now you can watch my latest videos easily.

Now let's make the Trifle For this we need Vanilla Pudding. I have already added a recipe video on how to make Vanilla Pudding to my channel. The link for it is given in the description box below. Whipping Cream.

I have made the cream by adding 1/3 cup of sugar and 1 tea spoon of vanilla to 400ml of Whipping Cream and after beating it well. You can take any flavor of cake you wish Cut them to small pieces like this. Strawberry and blackberry cut in to small pieces. For this also, you can take any fruit you like.

Strawberry, Blackberry and Cherries. For this also you can substitute some other fruit. Green and Red colored Jelly. This is a Trifle bowl.

It's better if you have a bowl like this. I got this bowl from Amazon. I'll put the link in the below description box below. Layers can be nicely seen from a bowl like this.

If you don't have a bowl like this, you can take some other transparent bowl. First add some raisins and tutti fruity to the vanilla pudding and mix them well. This is not essential. You can make it without this step if you prefer.

First add a layer of cake like this. Now place Strawberry and Blackberry at the edge like this. Now lay some cut fruits in the middle. Now add a layer of Vanilla pudding.

Carefully spread it and make the layer. Now cut the jelly like this and add a layer of them. Lay them as it'll be visible from sides well. Again a layer of cakes.

Now another layer of pudding. At the end, add a layer of whipping cream from a spoon like this. Now you can decorate it from cream like this. Now decorate it with cherry, black berry and strawberry.

You can add some sprinkles if you like. Please refrigerate this Trifle overnight or at least 5 hours before you consume it. Prepare the Vanilla Pudding and Jelly on the day before you make the Trifle. Then you can refrigerate them overnight.

Then it'll be easier for you when making the trifle. Trifle is a beautiful and delicious dessert suitable for parties and special occasions where many relatives or friends gather. You also can make this trifle and enjoy. If you like my videos, please give add a  like(thumbs up) add comments and subscribe to my Youtube Channel.

Let's meet again in another delicious video..

How to Make Rice PuddingEasy Rice Pudding Recipe

0 komentar

How to Make Rice PuddingEasy Rice Pudding Recipe

How to make rice pudding | easy rice pudding
recipe Hello and welcome back to In the Kitchen with
Matt, I am your host Matt Taylor. Today I am going to teach you how to make
rice pudding. I had a request to make a video on rice pudding,
so here we go, it's really easy to do, using simple everyday ingredients, let's get started. Ok so I am going to take a pot, so this is
going to be a one-pot method, traditionally two pots were used, I am just going to do
everything in the same pot, it works out fine.

So I got a medium sized pot here and I am
going to add ? Cup plus 2 Tablespoons, of rice, this is long grain rice but you can
use medium grain or short grain rice. Now this is only going to make about 2 servings,
so if you want to make a lot more just double or triple the recipe, then I am going to add
three quarters cup of water, and I am going to add one eight teaspoon of salt. Go ahead and give this a stir, now let's go
ahead and take this over to the stovetop and cook the rice. All right I have the rice going, I have it
on medium high heat, and we want to bring this to a boil, now if you want to cook your
rice, like in a separate rice cooker, you can certainly do that, for example if you
have a meal and you want to make some rice, for rice pudding, and use some extra rice
for something else, just go ahead and use that.

All right once we have our water boiling,
I am going to go ahead and turn down the heat to medium-low to let it simmer, for 10 to
15 minutes until the rice is soft but not super soft, and I am also going to cover this,
and then every once in awhile I am going to come in here and give it a nice little stir,
so we don't get it sticking on the bottom, looks like our rice is there. The water has absorbed, now what we are going
to do is we are going to add two cups of milk, you can add whole milk, 2%, 1%, if you use
whole milk it is going to be a little bit more creamy, if you use 2% or 1% it will be
less so, then let's turn the heat up to medium, then let's add one fourth cup of sugar, we
will give this a good stir, then we are going to continue to cook this, until the rice and
the milk all come together, and it will have a thicker consistency, it will, once we cool
it, it will get a little thicker, now you can actually stop at whatever consistency
you want, remember it is going to thicken up more when we let it cool, but I could stop
right now and this would be okay, I like it just a little thicker, so I am going to let
it cook here for uh, a couple of more minutes. It has been about 20 minutes total, now when
it gets to this stage where it is fairly thick, and it is bubbling a lot, you want to make
sure to stir it more frequently then before, otherwise it may burn on the bottom, and as
you notice I am using a nonstick, Teflon, pot, which really helps out, but it is not
necessary to use this kind of a pot you can use any pot. So now it is about the consistency that I
want it, like a thick porridge or like a runny oatmeal, great so I am going to turn down,
turn off the heat here, and we are going to continue to stir it, and then once the bubbles
subside here, I am going to go ahead and add in, ? Tsp.

Of vanilla extract. And also at this point if you want it a little
creamy you could add about a fourth cup of heavy whipping cream, also if you want to
add raisins you can add raisins in, you would probably do that half way before it is done,
just so that the raisins get soft, if you want your raisins to be harder go ahead and
put them in right now, now as you can see it is a nice consistency here, let's go ahead
and take this over and transfer this over to our serving bowls, now what I am going
to do is I am going to go ahead and transfer it to my little dishes here. All right at this point to you can eat it
warm just like this, but if you want it to be cooled, what you will do is take some plastic
wrap, and you will just cover it loosely with plastic wrap, and you could just put it in
the fridge and let it cool, simple as that. Also what I like to do is you come in here
with some cinnamon, and top it off with some cinnamon, awesome.

All right our rice pudding is done. It turned out amazing, really easy to do,
if I can do it you can do it, I am Matt Taylor this has been another episode of In the Kitchen
with Matt, thank you for joining me, as always if you have any questions or comments put
them down below and I will get back to you as soon as I can, thumbs up, down in the corner,
push it, don't forget to subscribe to my channel and check out my other videos, take care. Time for me to dive into this, oh yeah, mmm,
mmm, mmm..

How to Make Rice Pudding - The Basics on QVC

0 komentar

How to Make Rice Pudding - The Basics on QVC

You can serve it hot or you can serve it cold.
You can make it from scratch or you can use leftovers. Let's make some rice pudding. So
today we are going to make rice pudding from scratch. We've got our raw rice here, and
that leads us to our first question.

Which kind of rice should we use? We have a choice.
We have short grain, medium grain or long grain rice. Well short grain rice is going
to give us a creamier rice pudding so that's a great one to go with. You can use milk if
you are using short grain rice. Long grain rice is not quite as creamy so you might
want to substitute some of the milk with cream.

Today, we are going to use medium grain rice
which is pretty much perfect. I'm going to use a relatively big pan here with a lid
because we're going to cover the rice pudding as it cooks. I want a nice pan that is non-stick
because it's going to make it easier to clean and easier to stir all of that rice around.
First things first, we're going to get our milk into this pan. Now this might look like
a lot of milk but the reason we're using so much is because we're cooking our rice
from scratch.

That means the rice has to absorb all of that liquid as well as then become
creamy and soupy to that delicious rice pudding we all love. When you use raw rice it's a
four or five to one ratio of dairy to rice. If you are using leftover rice to make your
rice pudding you're going to use a one to one ratio of rice to dairy. We're going to
turn this on and bring it to a simmer.

We're going to stir everything together. As soon
as it comes to a simmer, we're going to turn this down to the lowest setting, and we're
going to put that lid on. Now every three to five, five to ten minutes, every once and
a while, come back and give this a good stir. Make sure there is enough liquid in there.
If you ever need to dilute this just add a little more milk or cream.

This rice pudding
should take you thirty-five to forty minutes. You're going to have stirred it regularly
so we're stirring it again here at the end. We're going to now flavor it. What do you
want it to taste like? Would you like to add lemon juice and lemon zest? Perhaps a little
orange juice, orange zest.

How about some white chocolate or even dark chocolate? I'm
going to add some bourbon soaked raisins. Very simple to do. Just soak your raisins
in the bourbon. When you start your rice pudding and a half hour later, you'll have raisins
like this.

They'll plump up. I'm straining out that bourbon. I'm adding the raisins.
Stir this in along with a couple of other ingredients. I'm always going to add some
vanilla extract.

That's just for a nice little boost of flavor. Then I'm looking for consistency.
How thin or thick do you want your rice pudding? I'm going to thin it just a tiny bit with
a little bit of heavy cream. That's going to add to the creaminess of our rice pudding.
Remember this rice will continue to absorb this liquid. If you're serving this cold,
you might want to reserve the cream until the rice is cold because of course it will
be thicker then.

Now my favorite part of any food preparation I'm going to taste it to
make sure it's perfect. The rice is so tender and delicious and creamy. This is perfect.
Before we serve it let's get rid of that cinnamon stick we had in there. Let's get
a dish.

Make sure everybody gets some raisins. Garnish it with a little bit of ground cinnamon.
That's a perfect dessert. Thanks for watching. If you would like to see more of the basics,
click over here.

If you would like to see everything I used in this recipe, click over
here. If you have any questions, comments, or suggestions for more Basics, put them in
the comment section below..

Blogger news

 
  • Home Cooking Ideas © 2012 | Designed by Rumah Dijual, in collaboration with Web Hosting , Blogger Templates and WP Themes