5 NEW Ice Cream Flavors + Dairy-Free Coconut Recipe Homemade Ice Cream (No Machine)

0 komentar

5 NEW Ice Cream Flavors + Dairy-Free Coconut Recipe Homemade Ice Cream (No Machine)

(Music) Gemma's Bigger Bolder Baking
Homemade Ice Cream Dairy-Free Hi Bold Bakers! Thanks to you, my No Machine
Ice Cream video has reached more than 1 million views. I have lots more No Machine creations
to come starting with this week's much-requested Dairy-Free No Machine Ice Cream which is based
on Coconut Milk. So let's get baking! So to make this Dairy-Free Ice Cream, we are
using the exact same method that you guys know and love from my original No Machine
Ice Cream video. We're just replacing the dairy with coconut milk.

This recipe is not
just for people who are dairy free. I want you all to try it because it really is a delicious
ice cream. We're going to start out by making our coconut
condensed milk for our ice cream base. So in a heavy-bottomed pan, we're going to
add in our full-fat coconut milk and our sugar.

Bring these two ingredients to a simmer and
then turn it down low and let it bubble away very gently for around 30 minutes. As it simmers, you will see it's actually
starting to change color and go a little bit darker and starting to thicken and that's exactly
what we want. Once your 30 minutes are up, this is what you should be left with: a thick
coconutty syrup and this is our condensed milk. We're going to pour this into a jug and set
it aside to cool down and put it into the refrigerator to get it really cold before
we make our ice cream.

When your condensed milk is cold, this is
what it should look like. Beautiful and syrupy. It needs to be lovely and thick and look just like
regular condensed milk. Our next step is to whip up our coconut.

You
want to put your two cans of coconut milk in the fridge overnight to get them really
nice and cold. Then, this is a really good, trick. We're going to take them out. You're
going to turn your coconut tin upside down and open it from the bottom and I'm going
to show you why.

What you want for this ice cream is the coconut
solid and not the water. And if you turn it upside down, as you can see the water rises
to the top. Pour away the coconut water. And then you have your coconut solids on the bottom.
It's the perfect way to decant the water from the solids.

We're going to scoop out the solids and put
them into our mixer. As for the water, don't throw it away. You can drink it because it
tastes really good and or put it into smoothies like I do, it's really hydrating
and yummy. Now using a stand mixer or a hand mixer, we're
going to whip up the coconut solids.

We're going to turn the machine on to medium-high speed
and we're going to whip this up and you're going to see it thicken and actually get bigger
in volume. This looks great! Now that it's looser and it's gotten a bit lighter, it's
time to add in our condensed milk. Now we're going to turn back on the machine and whip
it up again until you see it get bigger and fluffier. Another good tip for this ice cream
is to make sure all of your ingredients are cold even your bowl.

I like to put it into
the fridge before I use it. Great! So our ice cream base is ready. It
is that easy! So this is what it should look like. It needs to be nice and thick so it
freezes well and it holds its structure and it doesn't separate.

So a nice little tip before you add in your
flavors to your ice cream is to add in some vanilla extract. And vanilla extract has alcohol
in it and it will actually stop your ice cream base from crystallizing. I'm going to give it a little taste. You do
not have to be vegan or dairy-free to enjoy this ice cream.

It is so good! Our first flavor up is classic vanilla. I
want to say a big thank you to Sherry because she requested this flavor and she always sends
me such nice comments. Start by scooping your ice cream base into
a bowl. The funny thing is the coconut flavor is actually
quite mild so whatever flavor you add to it, you get a little bit of coconut and a lot
of your other flavor.

To this we're going to add in our vanilla
extract and fresh vanilla beans. If you don't have a fresh vanilla pod, don't worry about
it. Just use vanilla extract. And then just whisk it all together.

Look
at those beautiful speckles of vanilla bean. It looks fantastic! Just like before, we're going to put the prepared
ice cream into these lovely little containers. Look at that! Absolutely gorgeous. And you
can't beat a classic like vanilla.

Beautiful! We're going to call this flavor tropical vanilla.
I'm going to put a downloadable PDF for these stickers on my Facebook page so you can make
your own. And remember this flavor makes a great accompaniment for your microwave brownie
mug cake. This little guy is the first of many flavors
so we're going to pop him into the freezer and get started on the next one. I'm a big fan of the next flavor because I
ate a lot of it growing up.

And that is Raspberry Ripple! And thanks so much to CalicoCatGirl
y for the request. We're going to start out by blending together
some raspberries and sugar in a food processor. Then we're going to pass it through a sieve
and you end up with a lovely raspberry puree to add to your ice cream base. Now add your ice cream base to the bowl and
then ripple in your raspberry puree.

You don't want to stir in your raspberry too much because
you want to maintain those lovely ripples. The raspberry and coconut are such great flavors
together. There's a good reason this was my favorite flavor. This ice cream looks so beautiful.

Now for
the finishing touch. This is so good, you guys are going to love
this. We have more flavors to come so we're going to pop this in the freezer and then
on to the next one. All the recipes can be found below this video
in the description box.

And if you haven't done so already, don't forget to subscribe
to my channel. For our next flavor, Kavya Sivan suggested
something that goes really well with coconut which is pineapple for Pina Colada. Just like the Raspberry Ripple flavor, we're
going to make a puree with our pineapple. If you don't have fresh pineapple you can
use tinned or frozen.

Beautiful. Look at that color. I love pineapple so much. It's such
a nice fresh flavor.

And it's going to be yummy in our ice cream. Then in a large bowl, add in your ice cream
base and mix in your pineapple puree. We're also going to toss in a little bit of coconut
for extra flavor and texture. When you bring these two flavors together of the pineapple
and the coconut it really does remind you of a Pina Colada.

Once your ice cream is mixed,
then put it straight into your container. And then top it off with some toasted coconut.
Our ice cream is done so on with our sticker. Our next flavor up, in my opinion, is an absolute
must and that is chocolate. And because our ice cream base is coconut, we're going to
make Almond Joy Ice Cream.

This flavor is really no fuss: you add your
ice cream base into your bowl. Sift over some cocoa powder and fold in toasted almonds.
It couldn't be easier! We are using cocoa powder instead of fresh chocolate to flavor
this ice cream because cocoa powder is dairy-free. This is so good it's kind of like a coconut
mousse and the almonds definitely give it really nice texture. Make sure you toast them because
they pop a little bit more.

As you can see, this is a beautiful thick
ice cream. I think it's the cocoa powder that does it. For a little something extra, I'm
going to top it off with some toasted almonds. You guys are going to go Coco-Nuts for this
one.

And he's ready for the freezer. Gosh. I can actually smell this already and it smells
so good. I can't wait to try it.

I have all of the comments and requests for
this next flavor, so I'm happy to finally bring you Matcha Green Tea Ice Cream. I'm going to write in the recipe which Matcha
Powder I used but you can find it in most stores it's just on the pricey side. In a bowl, add in your ice cream base. And
sprinkle over your Matcha Green Tea powder.

And then gently mix together until well combined.
So I'll admit, I've never had green tea ice cream before but with all of your requests
coming in I just had to try it and you were dead on because it tastes really good. Once it's all mixed, it's ready for the container.
I really hope Id did this flavor justice for you guys. Would you like a bonus ice cream flavor? I
shared my recipe for a Caramelized Banana Ice Cream over on my Instagram. So guys make
sure you go over there and check it out.

It's a really good one! This coconut ice cream is so good and I really
want you guys to try it. Just because it's vegan, does not mean that it's not for everybody.
Thanks for all the great requests for this video. You guys picked some great flavors
of ice cream and I couldn't do it without you. Mmmm.

If you like my No Machine Ice Cream recipe,
then please share this video with a friend. And make sure you head over to my Instagram
for the 6th bonus flavor! I'll see you back here again next Thursday for more Bigger Bolder
Baking..

5 Microwave Mug Meals (Mug Pizza, Chocolate Brownie & More!)Gemma's Bigger Bolder Baking

0 komentar

5 Microwave Mug Meals (Mug Pizza, Chocolate Brownie & More!)Gemma's Bigger Bolder Baking

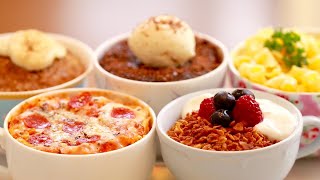
Hi Bold Bakers! When it comes to mug recipes,
I have you covered for breakfast and dessert. But now in this one video, I am going to show
you a mug recipe for every meal. From granola, to mac and cheese, to even pizza in a mug.
These recipes are real game changers. So lets get started.

Were going to kick this off with breakfast,
the most important meal of the day. And did you know you can make granola in a microwave?
It comes out crunchy and just like its baked. Let me show you how. In a microwavable
mug, add in your maple syrup, flavorless oil (I used coconut), and water.

To this add in
your oats, coconut, salt, and nuts. And then mix it all together. What I love about this
granola is that its full of natural sugars. You can add in whatever flavor you like and
also, its great for vegans.

Now that this guy is mixed, were going to pop it into
the microwave for one minute. Then you want to give it a stir, and then pop it back in
again for another thirty seconds. Youll keep on going until your granola is lovely
and golden brown and youll see it start to get crispy and dry. The timing that I give
for my mug recipes is based on my microwave, which is 1200 watts.

So make sure that you
check yours because your timing may vary. And as always, all my recipes can be found
on www.Biggerbolderbaking.Com. Once your granola is done cooking, this is what it looks like.
Its a beautiful golden brown and you can probably hear it is lovely and toasted. Even
the nuts are.

Its hard to believe you can make this in a microwave. Were going to
take our homemade granola and make it into a complete breakfast. I like to eat my granola
with some greek yogurt and some berries on top. Granola paired with yogurt and berries
is a perfect balanced breakfast and a great way to start your day.

You can even mix up
your granola the day before and then cook it off the next morning. Ok were going
to move on to our next meal. Now that were done with breakfast, were
going to move on to lunch. And you will not believe how easy it is to make mac and cheese
in a microwave.

For this recipe, you want a very large microwavable mug or even a bowl
because you dont want the water to overflow while cooking. Into your bowl, add in your
macaroni noodles. Use small noodles because they cook faster. Onto your noodles, pour
in cold water.

Now were going to microwave this until its fully cooked. It just takes
a few minutes. Youll know when your macaroni is cooked because your noodles will have plumped
up and theyll be really nice and tender. Our next step is to drain off this water and
add in the rest of our ingredients.

To make our mac and cheese sauce, were going to
add in some milk, corn starch or corn flour, lovely sharp cheddar, and of course some pepper
and salt to season. And then simply mix all these ingredients together. The reason we
add in the corn flour is because it thickens it and binds it all together. Also, if you
want to add in some vegetables or meat in, you totally can.

All we have to do now is
pop it back in the microwave for a few more seconds, let the cheese melt and create that
sauce, and we will be eating homemade mac and cheese in no time. This incredibly easy
homemade mac and cheese requires no pots and pans, just a big mug and few minutes. Your
mac and cheese does not need much dressing up. So I like to put just a little bit of
parsley on top.

I have no doubt that you can make this mac and cheese faster than you can
make it from a box. And you know what, this tastes better and its better for you. Ok
on to our next meal. Ok so weve had our lunch but its about
3 oclock in the afternoon when you start to feel that slump.

I have the perfect peanut
butter and banana muffin that has lovely all natural sugars, no flour, and its full
of good energy. In a microwavable mug, were going to mash up some fresh banana. To this,
were going to add in some peanut butter, an egg white, and some vanilla extract. And
then whisk it all together.

Dont worry, if you dont like peanut butter or are allergic,
you can use any kind of nut butter you like. So to this, Im going to add oat flour,
which is just ground up oats in a food processor. But you can always use regular flour or whole
wheat flour. Next add ground cinnamon, baking powder, and a pinch of salt.

And then mix
all of these ingredients together. In just a few minutes, our afternoon snack is ready
for the microwave. A healthy snack needs to be something you can whip up when youre
hungry. And it does not get much faster than this peanut butter and banana muffin.

This
snack does not need a lot. I like to add a little bit of fresh banana and a sprinkling
of cinnamon. This mug cake is a perfect pick me up for the afternoon or even to give you
some great energy after a workout. And it tastes great too.

Now its dinner time and were having
pizza made in a mug. Words can not describe how great this recipe is, so Im just going
to get started and you can see for yourselves. In a microwavable mug, add in your flour,
baking powder, baking soda, and a pinch of salt. And then mix them all together.

Into
our dry mix, Im going to add in milk and olive oil. And then mix all these ingredients
together. And thats our pizza base done. Super fast.

Ok now like any great pizza, next
thing were going to put on is our sauce. Gently spoon your sauce onto your pizza base.
And then just spread it around with your spoon. Now you can add on any toppings you like because
its your pizza. Im going to add on cheese, mini pepperonis, and some dried herbs.

Our
mug pizza is ready for the microwave. Now I havent steered you wrong yet, so I really
cant wait for you to see when this is done. Our microwave pizza is ready. This is the
moment I wanted you to see.

Look at that mug pizza. Doesnt it look fantastic and it
smells amazing. So you can make one of these and even eat it faster than you can get a
pizza delivered. So the next time you want a pizza, this is your guy.

This pizza is ready
to eat as is. So I guess youre wondering what this looks and tastes like because believe
me, before I made it, I was too. But check this out, it has a lovely pastry base with
all that lovely marinara sauce and cheese on top and of course the little pepperonis
make it taste really good too. It tastes just like pizza.

Its soft, its gooey, its
insane. You have to try this. Well youre probably wondering what dessert
could be for our grand finale. And it is a chocolatey, fudgiest brownie made in a microwave.
In a microwavable mug, add in your flour, brown sugar, cocoa powder, and a pinch of
salt.

And then mix all these ingredients together. To your dry ingredients, add in your flavorless
oil (I used coconut), water, vanilla extract, and chocolate chips. And then mix until you
have a batter. This brownie does not contain eggs so its a really rich, indulgent cake.
After all our lovely microwave meals, were finally ready for dessert.

No more do you
have to bake a big tray of brownies. You can whip one up just for yourself and you dont
have to share. Simply serve your warm, fudgey brownie with some vanilla ice cream and some
chocolate shavings on top. As you can see, this brownie is so rich and decadent and definitely
the perfect recipe to wrap up our microwave mug meals.

Whether you are looking for quick
meal options or even incredible desserts, these microwave mug meals have you covered.
If you havent already done so, dont forget to subscribe to my channel so you dont
miss out on any videos. Ill see you back here next Thursday for more Bigger, Bolder
Baking. Whew!!! Im full.

4 EASY VEGAN PICNIC RECIPEShot for food

0 komentar

4 EASY VEGAN PICNIC RECIPEShot for food

[Lauren] you just put the whole one in your mouth? [Lauren] that's a lot of dough at once
[john] it's really dry. [Lauren] don't say it's dry! [John] well if you ate a spoonful of peanut butter that would also have made a really tough dough [lauren] well you're not supposed to put it all in your mouth at once, i don't think. [Lauren] hey everyone, what's going on it's lauren. [John] and john.

[Lauren] from hot for food. And today we're doing an impromptu little video for you [lauren] because, um, we have to go to a picnic [lauren] more or less. And we have to bring some stuff. [Lauren] so we were gonna show you what we're making [lauren] and it's pretty quick and easy, so we thought we just turn it into a video.

[John] uh, you can do your picnic however you wanna do, [john] this is just kinda what we have lying around the house, [john] on our summer picnic menu, we've got [john] an easy sangria recipe, [lauren] we're also gonna make some very quick wraps, [lauren] we're also gonna make some lentil apple slaw [lauren] and cookie dough balls for dessert [lauren] soo let's start with dessert because we gotta put those in the fridge for a second [john] good call. [Lauren] so we are gonna start with a cup of peanut butter, [lauren] then add in some almond flour and vegan chocolate chips. [Lauren] i'm actually just gonna add a little bit of sea salt [lauren] so cos i'm literally making this up on the spot, [lauren] i don't know how much almond flour i'm adding in, [lauren] but it's about double and a half what the peanut butter was. [Lauren] so it's like the consistency of cookie dough, [lauren] then roll it into small bite sized balls, [lauren] and then you can roll it in coconut [lauren] or you can drizzle melted chocolate on them, [lauren] whatever you like.

[Lauren] and you can keep them in the fridge until you go on your picnic! [John] so now we're gonna make the fillings for our easy wraps, [john] the first one's an avocado mash, which is just avocado, [john] lime juice, salt, pepper and cayenne. [John] for the other filling we're gonna use a hummus [john] you can do it storebought or make it yourself [john] and then we're gonna add sundried tomatoes, [john] and black olives. [John] these things are super easy to assemble, [john] you're just gonna apread out your avocado or hummus, [john] on the avocado we're gonna add fresh basil. [John] so now that you got your filling in place, [john] you can either roll them up, [john] or do quesadilla style.

[John] i think the key here is the mobility, [john] you're like going on a picnic, or going to the beach [john] you don't wanna have like your hummus container, [john] and your guacamole container and all of these dips [john] and these are mobile, portable, everything's wrapped up and good to go. [John] so it doesn't matter if you..
[Lauren] so you just grab a piece and eat it. [John] yea. [John] and it's sharing.

So instead of having some dips and hummus, [john] you've just got every, take a pre dipped and roll bite [lauren] i like this idea. [Lauren] and of course you can do any fillings you want [lauren] as long as it's easy to like, stick together like a hummus is [lauren] but it could be like an eggplant dip or  whatever you want. [John] you could do a dessert one; a peanut butter and jelly one. [Lauren] totally.

[Lauren] okay we're gonna bring a salad on the picnic [lauren] and i'm gonna make lentil apple slaw which is a really easy recipe [lauren] from hotforfoodblog.Com [lauren] here's how it's made [lauren] so start with some finely chopped cabbage, [lauren] then we're gonna add cooked lentils, [lauren] diced carrot. Diced cucumber, [lauren] sliced apples, [lauren] cilantro, green onion and pumpkin seeds or sunflower seeds. [Lauren] or both. [Lauren] so we're gonna make a quick dressing in a jar, [lauren] here's all the ingredients: [lauren] olive oil, [lauren] lemon juice, [lauren] lemon zest, [lauren] apple cider vinegar, [lauren] vegan worcestershire, [lauren] agave nectar, [lauren] dijon mustard, [lauren] and salt and pepper.

[Lauren] so just shake it up in the jar, [lauren] and then pour it on the salad. [Lauren] this salad actually benefits from being dressed a few hours before you're gonna eat it [john] kay, our picnic is nearly complete, [john] we're like, 20 minutes in, we're ready to go. [Lauren] i don't wanna go, i just wanna eat everything here. [Lauren] we gotta pack it up now [lauren] that's a whole lotta thing which we won't show you.

[John] one more thing.
[Lauren] one more thing. [Lauren] sangria!!! [Lauren] you know how to make that, it's just red wine, [lauren] some juice or whatever, and some brandy [lauren] if you're extra spicy like us, [john] some fruit.
[Lauren] and some fruit. [John] sangria.
[Lauren] so we're just gonna, we're just gonna make it real fast, [lauren] in these jars so we can take them on our picnic, [lauren] they're sealed up with a lid, and then we'll add ice in there, [lauren] and we're done! [John] then we go [lauren] and then we go.

[Lauren] so we got two one-litre jars, [lauren] we're gonna split a bottle of red wine between the two, [lauren] it's about a cup and a half per jar, [lauren] then we're gonna add one and a half ounces of brandy, [lauren] we're gonna add apples, oranges, limes and frozen strawberries. [Lauren] and we're gonna top it up with fresh squeezed orange juice. [Lauren] and just add a little bit of ice. [Lauren] and there's our picnic! We've got sangria, [lauren] a cool salad, [john] our easy wraps, [john] and for dessert, our cookie dough balls.

[John] go easy on the sangria, man. [Lauren] mm. [Lauren] so we put some ice in there to chill it, it's cold  and ready to go. [Lauren] um, you probably wanna pack up your picnic in like a cooler [lauren] picnic bag or cooler [lauren] just to keep everything chilled, that will be best especially for the dessert [lauren] which you won't be eating till later, [john] can we try something before we pack it up.
[Lauren] aand [lauren] well yea, i'm starving [john] me too.

[John] i'm gonna try an avocado one. [Lauren] so it's really quick and easy, we got everything done in under an hour, [lauren] um, i mean we're pros but [lauren] we made some of these up right on the spot so there you go [lauren] um, you can find the recipes linked in the description below, [lauren] aand if you've got any ideas you're taking to your picnic [lauren] your vegan picnics, please let us know and share them with us as well. [Lauren] there's lots of ideas on this channel, [lauren] as well as hotforfoodblog.Com um with other things you can bring on a picnic, [lauren] of course. [John] if you guys have your picnic photos, you wanna share with us, we're @hotforfood on all social media [john] go give us a follow there, subscribe if you like our videos, [john] every wednesday you're gonna see a new one from us [john] and today we gotta,
[lauren] we gotta go! [Lauren] or we'll be late for the dang picnic.

[John] we are actually going somewhere okay. [Lauren] you keep saying that, people are gonna think we're lying. [John] no, we are. [Lauren] "we're actually going somewhere" it sounds like you're
[john] does it sound suspicious? [John] we have friends.

[John] not just the internet friends.
[Lauren] yea [john] but you guys are friends too. [Lauren] we love you, but we're gonna see real people in real life right now [john] real humans. [Lauren] bye!.

3 VEGAN & HEALTHY LUNCH BOX IDEAS (BENTO)

0 komentar

3 VEGAN & HEALTHY LUNCH BOX IDEAS (BENTO)

Hello everyone welcome back and if you're
new to my channel welcome! My name is Amelie and make fitness and vegan food
recipe videos and I also make other videos when I feel like it.
In case your parents didn't tell you enough or in case you haven't seen those hundreds of
thousands of millions back-to-school videos here on YouTube, i'm here to
remind you that school is back on soon. You're welcome.
I'm currently not going to school anymore but i thought it would be cool for me to share with you guys three cool easy tasty cheap vegan ideas on
what you could bring and pack to school or work or university or anywhere else you
need to bring your own food. I tried my best to combine nutritious
foods that provide you with everything you need to keep you full of energy and
achieve everything that needs to be done. Also i'm using my bento box that i
have just received the other day and no this is not a sponsored video i wish
they could pay me but they didn't they actually send me this box i'm using the
box because I think its pretty in the video and also it can actually fit
quite a lot of food in it.

Alright so i think that's it let's get
into it. So the first box is inspired by Middle East cuisine To make the tabouleh
a precooked my couscous in the microwave takes literaly no time to make, and then
I'm cutting my tomatoes into cubes and I like to add a little bit of salt so
that the water goes away.  And then I'm adding it to the bowl with some shallots
some fresh parsely thinly chopped. Cucumber and lime juice and a little bit of salt and if you have
time i would suggest you do that the night before so that everything is infused, but if you don't that's fine too.

Then I'm taking a wrap (basic tortilla) and
spreading some hummus on top of it and i'm adding few tablespoons of the tabouleh.
I bought these falafel from the shops but you can also make your own with chickpeas yeah i just cooked up for six minutes
and then I put three of them into the wrap and I try to roll it . This is
kind of the hardest part. Hold it tight and everything will be fine! And as it's a
lunch i would make, another one.

In the first part of the box im adding
three half wraps and in the other box im adding the last half, the rest of the
tabouleh. In the little box, I chose to add a tahini dip to dip the wrap in. So i use lime
juice and tahini... And I thin it out with some water so it gets creamier.

And I also chose to add two little bliss balls made out of date oats and coconut.
This lunch is very consistent i promise you i ate it straightaway after making this video
and I was really full the whole afternoon For the second box, I decided to get a
Mexican one yes we are traveling! This one actually
requires to be heated up in the microwave.But im pretty sure you'll be able to find a microwave anywhere now.. So to make the chili sin Carne, I'm
chopping up some onions and I put them in a pot with some Mexican spices with no
oil, water it's just fine. I cook them until theyre soft and then I add some
frozen capsicum.. You can totally get some fresh one I was just lazy!
Stir everything together well and then you're going to add your rinsed and drained kidney beans, youcan also use black beans I didn't have any and then I added some tomatoes, and again stir it well..

And after 10 minutes or so things start to be soft. I added on spice mix
again and then i added corn and I left it for another five minutes.
So in the first part of the box, I chose to add quinoa, you can add rice, you can add couscous, you can add anything else.. Pasta.. And then on the other half i'm adding the chili In the 2nd box I'm doing sort of mexican salad with guacamode, so I'm mash the avo in its skin, it saves a bowl and then I add cayenne pepper and lime
juice and this is pretty much the perfect guacaome.

And then I scoop it in,
and then I put some tortillas on the side. I made my own they're very easy to
make out of actual tortillas and yeah you can also buy premade tortillas but
these are fun to make and usually healthier I just cut them into triangles and put them in
the oven for 5 minutes! This lunch is filled with good carbs and
protein and good fat to keep going through the day, it is actually a little
bit longer to prepare but I would suggest you make the chili sin carne for dinner,
and then you just use the left over for your lunch look at that avo tho.. Oh my god!!
For the last box I decided to make a Greek salad with oven baked sweet potato.
For the salad i used olives, kalamata would have been better but yea.. Shallots, cucumber
tomato, lime juice, oregano, salt and i use a little bit of olive oil feel free to skip it but i just think
that Greek salad without olive oil isn't a Greek salad! And for the feta i actually usedsome fermented ,I think, tofu.

I bought it you can also find a lot of recipes online..
So I'm adding everything to the bowl next I'm cutting off some circles from
a tortilla, actually using a pita would taste hundred times better but I didn't want
to buy hundred thousand of different things! So yeah and also the circles are not
necessary!  I just find they're cute. For the sweet potato I just make a cut so that it cooks faster and then I cut the end bits and then I roll it into
baking paper and I'm make sure it's very tight and I cook it for about 30 to 40
minutes in the oven at 200 degrees. When you get it out of the oven be careful
because it's very hot but it should be very soft and goey and  oh my god sooo good so in the first box i'm adding my greek salad of course and then in other part im adding sweet
potatoes, in the little box im adding some houmous this one is store-bought but you can definitely make your own I also have a video on it, ill link it in the description box!
I was just a lazy girl today!!! Then, I'm adding my pitas / tortillas to dip
into the hummous! Thats it guys for today's video I hope you enjoyed
watching it and if u did go give this video a thumbs up! Also if you haven't
subscribed to my channel yet and you liked this video I would suggest u do so,
so you can keep updated with everything im uploading, there's gonna be a whole lot
more videos coming. Also leave me in the comments down below anything you like to see or if you want to see other ideas on what you bring to school or elsewhere
just let me now in the comments down below.

I will read everyone's comments and I'll try
to asnwer you all. So yeah thank you so much for watching and I'll talk to you
later <3.

Blogger news

 
  • Home Cooking Ideas © 2012 | Designed by Rumah Dijual, in collaboration with Web Hosting , Blogger Templates and WP Themes